7 Best Roof Cutter Machines for Every Budget
Choosing a Roof Cutter Machine is less about finding the most powerful tool and more about matching it to the job. Roof materials vary, and so do cutting needs. A machine suited to occasional asphalt-shingle work may not handle thick insulation or repeated cuts comfortably. Blade depth, motor performance, handling, and replacement-part availability all deserve a close look.
Small details matter. A stable grip can make a long cutting session less tiring. Clear depth settings help reduce uneven cuts, while accessible controls are useful when work gets demanding. Still, specifications do not tell the whole story. Real-world performance depends on material condition, operator experience, and maintenance. That part is easy to overlook.
This guide compares seven roof cutter machines across different price ranges, from practical options for occasional projects to higher-capacity models for frequent use. We focus on features buyers can verify, such as cutting capacity, build quality, ease of adjustment, and stated support from manufacturers. Prices and availability can change, so check current product details before buying. No single machine fits every roof. Use the comparisons to narrow your choices, then consider your materials, workload, and comfort with the tool. Even a well-reviewed model may feel wrong in your hands. That is worth remembering.
What Roof Cutter Machines Do and How They Work
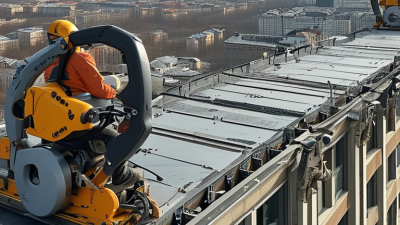
Roof cutter machines help crews divide roofing material into manageable strips during removal or repair. Depending on the model, a powered blade may cut shingles, membrane, or built-up roofing. The operator guides the machine across the surface while its wheels steady the cut. Blade design and cutting depth vary, so a setting suitable for one roof may damage another.
The key is controlling how deeply the blade enters. A cut should pass through the roofing layers without unnecessarily reaching the deck beneath them. On an older roof, hidden patches and uneven layers can make that harder than it sounds. Make a short test cut in a suitable area, then inspect the layers before continuing. Small adjustments matter.
Keep the machine moving at a steady pace. Forcing it can cause rough cuts, blade wear, or sudden movement. Loose gravel, raised seams, and nails can also change how it tracks. Clear the work path and use the protective equipment specified by the machine’s instructions. Dust and flying debris are easy to underestimate. So is fatigue. Pause to check the blade and cut line, especially when roof conditions change. A careful setup may feel slow, but correcting a damaged deck takes longer.
Main Types and Features Across Different Price Ranges
Roof cutter machines vary by material, workload, and budget. Entry-level manual cutters suit occasional trimming of compatible roofing membranes or shingles. They are light, simple to maintain, and need no power outlet. Cuts may take longer, and thick or rigid materials can strain the operator. Always check the machine’s rated material and cutting depth before buying.
Mid-priced powered cutters can handle repeated cuts more quickly. Depending on the design, they may use a circular blade, guided track, or shearing action. Look for adjustable cutting depth, a stable base, replaceable blades, and accessible dust collection. Higher-priced machines often add stronger motors, longer guides, and controls for consistent production. Those features help on large jobs, but they add weight and maintenance needs. More capacity is not always better.
Tips: Match the cutter to the roofing material, not just its price. Test a sample piece first. Wear suitable eye and hearing protection, secure the work, and follow the machine manual. A neat cut matters, but edge quality can still vary with blade condition and operator setup. I would budget for replacement blades, too; that cost is easy to overlook.
Seven Roof Cutter Machines Compared by Budget and Capability
7 Best Roof Cutter Machines for Every Budget
Seven Roof Cutter Machines Compared by Budget and Capability
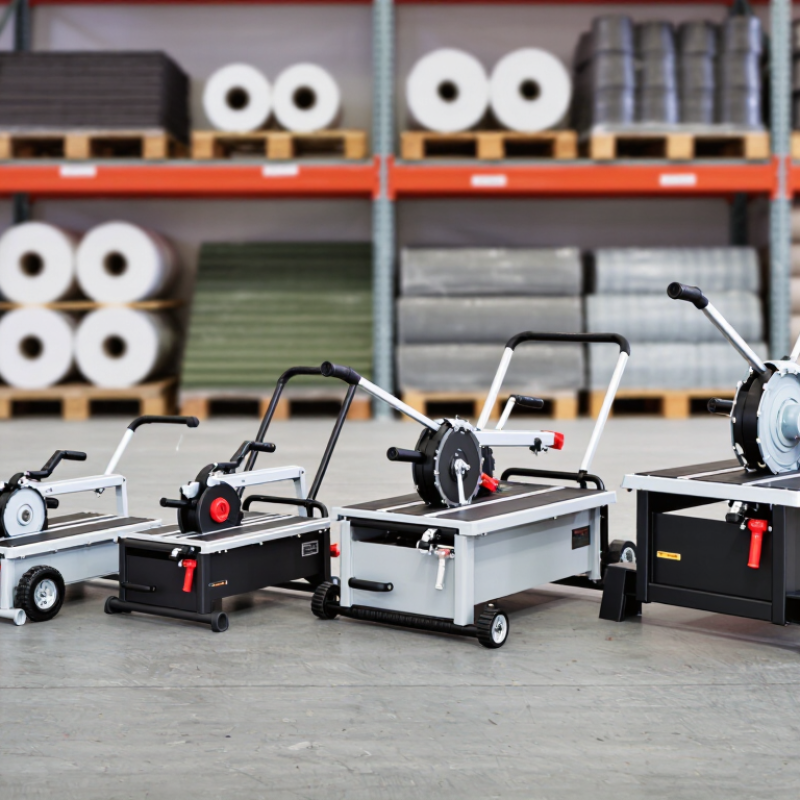
Roof cutter machines range from compact, manually guided units to powered walk-behind models built for larger tear-offs. Entry-level cutters can suit small repairs and occasional work, though they demand more operator effort. Mid-range machines often balance cutting speed, handling, and transport needs. Heavy-duty models can cover broad roof sections quickly, but their weight and upkeep may not make sense for every crew.
Compare more than purchase price. Check cutting width, adjustable depth, blade access, and how easily the machine moves across the roof. A narrow cutter may handle tight valleys better; a wider deck can reduce passes on open sections. On steep or fragile surfaces, control and stability matter more than raw speed. Dust, old fasteners, and uneven layers can also slow a machine down. Specs help, but they do not tell the whole story.
Tips: Match the cutter to your typical roof area and material, not your biggest job. Confirm the manual’s slope limits and maintenance schedule. Check blade condition before each use, and secure the work area. A cheaper machine can cost more in downtime; that trade-off is easy to miss.
How to Assess Cutting Performance, Safety, and Maintenance
A roof cutter’s value appears in the cut, not its advertised motor power. Test it on the same roofing material and thickness you use on site. Record cutting speed, depth consistency, edge tearing, and whether the machine stalls during a steady pass. A neat first cut can mislead; repeat the test after several passes, when heat and debris may affect performance. Also check whether blade changes require special tools and whether replacement parts are easy to obtain.
Safety deserves equal weight. When cutting materials that contain crystalline silica, OSHA’s construction standard sets an eight-hour permissible exposure limit of 50 micrograms per cubic meter, with an action level of 25 micrograms. Dust controls and suitable work practices matter. Noise matters. NIOSH’s Criteria for a Recommended Standard: Occupational Noise identifies 85 dBA over eight hours as its recommended exposure limit. Compare measured noise with that benchmark, and account for hearing protection. Before each shift, inspect the blade, guard, cables, and dust-control connections. Follow the maintenance schedule, but don’t treat it as a substitute for inspection. One uncertainty remains: real roof conditions rarely match a tidy workshop test.
How to Choose a Roof Cutter Machine for Your Project
Choosing a roof cutter starts with the material, not the price tag. Asphalt shingles, single-ply membranes, and rigid panels need different blades and cutting approaches. Check the machine’s specifications against the exact roofing layers on your project. A cutter that handles shingles may not suit a thick membrane. Don’t guess.
Next, consider roof size and access. For a small repair, a lighter manual or compact electric cutter may be easier to position. Large tear-off areas can justify a more powerful machine, but weight matters on slopes and around vents. Look for adjustable cutting depth, a stable base, and controls you can reach without awkward wrist movements. This is easy to overlook.
Budget for more than the machine. Blades, replacement parts, dust control, and maintenance affect the real cost. Renting can make sense for a one-time job, though availability and setup time may complicate the schedule. Before buying or renting, ask how quickly blades can be changed and whether the cutter works with your power supply. Check the manual, wear suitable eye and hearing protection, and secure the work area. I would not choose a model based on advertised cutting speed alone; a fast tool can still leave rough edges or become tiring during a full day.
7 Best Roof Cutter Machines for Every Budget — How to Choose for Your Project
Typical Roofing-Material Thickness
Use the material thickness as a starting point when checking cutter depth. These are approximate single-material ranges, not machine cutting-capacity ratings; actual thickness varies by product and roof assembly. Account for all layers and confirm the required depth with the machine manufacturer before cutting.