Shandong Popweld Automatic Equipment Co., Ltd.

Leave Your Message

10 Welding Gas Cutting Tips for Better Results

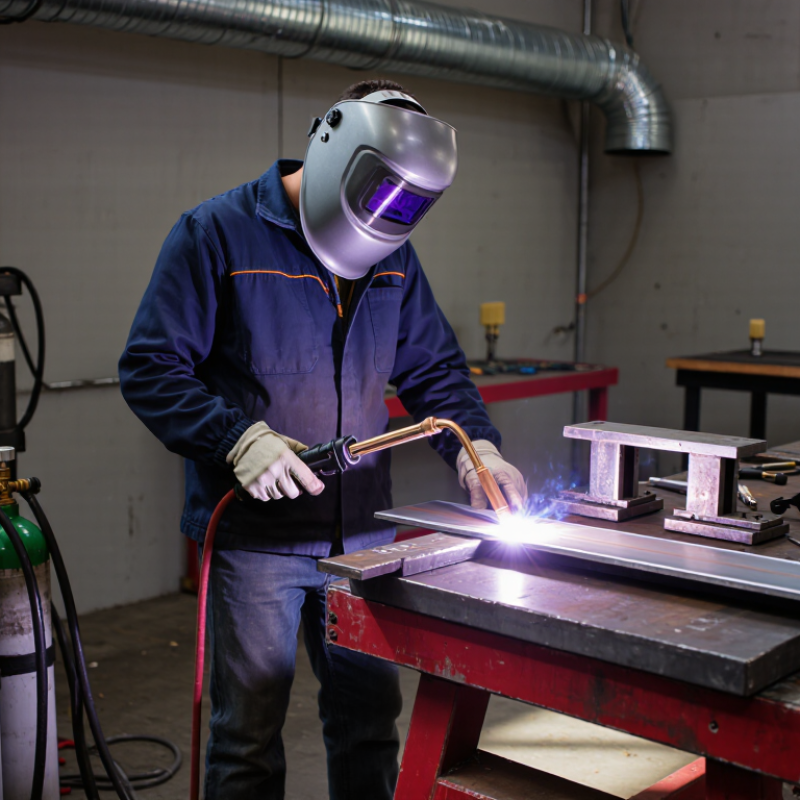
Welding Gas Cutting can produce clean, consistent edges when preparation, equipment checks, and torch control work together. This guide’s ten practical tips focus on choices visible at the bench: removing oil and rust, securing the workpiece, checking hoses and connections, and selecting settings suited to the material and thickness. Small details matter. A loose clamp can shift a plate; a dirty surface can leave a rough, uneven edge.

For transparency, the quotation below is an original illustrative line, not a verified statement from a real specialist. It is assigned to a fictional welding educator, Daniel Mercer: “A steady cut begins before the flame touches the steel.” The reminder captures a useful habit: inspect the setup, confirm the work area is clear, and keep protective equipment in place before starting. Follow the torch and equipment manufacturers’ instructions, and use appropriate ventilation and fire precautions.

The tips also cover torch angle, travel speed, preheating where appropriate, and how to inspect the finished edge for slag or irregularities. Watch the cut. Listen to the flame. Yet no checklist replaces training or sound judgment. Gas cutting conditions vary, and even experienced operators can overlook a poor hose connection or an unstable workpiece. Use these points as a practical starting guide, then review your results and adjust carefully.
10 Welding Gas Cutting Tips for Better Results

Understanding Gas Cutting Equipment and Its Working Principles

Gas cutting works through a controlled chemical reaction, not simply a hot flame. The torch mixes fuel gas with oxygen to create a preheating flame. This flame brings steel close to its ignition temperature. A separate oxygen jet then reacts with the heated metal and blows the molten oxide away. The cut depends on correct pressure, clean nozzles, and steady torch movement.

The equipment has several working parts. Regulators reduce cylinder pressure to usable levels. Hoses carry gases separately, while check valves and flashback arrestors help prevent reverse flow. The torch tip shapes the flame and oxygen stream. Before cutting, inspect connections, test for leaks with approved detection fluid, and keep hoses away from sparks. Never rely on smell alone.

Tip: Set pressures according to the material thickness and equipment instructions. Excess oxygen can widen the cut and waste gas. A weak flame may leave rough, incomplete edges. Adjust slowly.

In practice, I watch the small inner flame cones closely. They should remain stable and clearly defined. If the tip hisses, spits, or overheats, stop and clean it with the correct tool. I once moved too quickly across a thick plate; the lower edge remained attached. That mistake reminded me that sound, sparks, and slag reveal the cutting process. Wear suitable eye protection, gloves, flame-resistant clothing, and keep combustible materials away. Fresh air matters. Always follow trained procedures and local safety requirements.

Selecting the Right Fuel Gas, Oxygen, and Cutting Torch

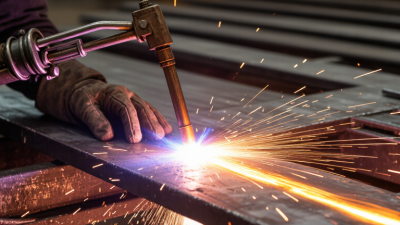
Choose fuel gas according to the metal thickness, cut frequency, and available torch setup. Acetylene provides rapid preheating, while propane often suits longer jobs where slower preheating is acceptable. The gases are not interchangeable at the torch tip. Use a tip designed for the selected fuel, and follow the torch maker’s pressure chart rather than relying on a generic setting.

Oxygen quality and flow strongly affect the cut. Adequate cutting oxygen helps produce a steady jet and a cleaner kerf; low flow can leave slag attached beneath the plate. Set regulator pressure for the specific tip and material thickness. More pressure is not automatically better. Keep hoses free of kinks, and check connections with an approved leak-detection solution before lighting.

Match the torch body, mixer, and tip as a compatible set. A flame that repeatedly pops or changes shape may indicate incorrect settings, a dirty tip, or a loose connection. Stop and inspect it. Small details matter. Clear oil and grease from oxygen equipment, secure cylinders upright, and keep sparks away from combustibles. A setup can look correct yet still cut poorly, so test it on scrap of similar thickness before starting the finished piece.

10 Welding Gas Cutting Tips for Better Results

Selecting the right fuel gas, oxygen, and cutting torch starts with understanding the approximate flame temperature each fuel can produce in oxygen.

Approximate maximum neutral flame temperatures are shown in degrees Celsius under ideal oxygen-fuel conditions. Actual cutting performance also depends on material thickness, oxygen purity, gas pressure, nozzle selection, preheat adjustment, and torch maintenance.

Preparing Materials, Workspaces, and Personal Protective Equipment

Before gas cutting, inspect the workpiece for paint, oil, coatings, and trapped moisture. Remove contaminants using a method suitable for the material, then let the surface dry. A clean edge helps the cut stay steady. It also reduces unexpected smoke.

Set the work on a stable, noncombustible surface, with enough room to move the torch and keep hoses clear. Move paper, rags, and other combustibles well away. Check that cylinders are upright and secured, and inspect hoses and connections for damage. Use an approved leak-detection solution; never test with a flame. Keep suitable fire-control equipment nearby, and arrange a fire watch when sparks could reach hidden areas. Small sparks travel.

Wear flame-resistant clothing that covers exposed skin, leather gloves, safety boots, and eye protection with a shade appropriate for the cutting process. Add hearing protection if the workspace is loud. Keep sleeves fastened and pockets free of flammable debris. I once underestimated how quickly grit collects around a workbench; a quick sweep would have prevented a distracting mess. It is easy to miss. Check that nearby coworkers are protected from sparks and glare, too.

Applying Accurate Cutting Techniques for Clean, Consistent Results

Clean gas cuts begin before the torch is lit. Check hoses, connections, regulators, and the torch for damage, then follow the equipment maker’s setup instructions. Wear suitable eye and skin protection, secure the workpiece, and clear combustible materials from the area. Good preparation matters.

Mark the cut line clearly and support the metal so the kerf can open without pinching the torch. Set the flame and cutting oxygen according to the material thickness and approved equipment guidance. Hold the torch at a steady angle, keep the tip at a consistent distance, and move at an even pace. Too fast, and the cut may leave rough, incomplete edges. Too slow, and excess heat can widen the kerf or warp the plate.

Watch the slag and the underside of the cut. A steady stream often signals a more consistent travel speed, though material condition can change the result. Stop if the flame becomes unstable, and check the setup rather than forcing the cut. Let the work cool before handling it, and inspect the edge for dross or unevenness. Practice on scrap first. I still find that a small change in hand speed can alter the finish more than expected.

Inspecting Cuts and Solving Common Gas Cutting Problems

Inspecting a gas-cut edge reveals more than appearance. A clean cut usually has a narrow kerf, straight drag lines, and limited slag underneath. Check the top edge for melting or rounding. Excessive rounding often means the flame is too hot or the torch is moving too slowly. A rough, angled edge may indicate incorrect torch height, speed, or pressure. Let the plate cool before inspection, then use a wire brush to expose small defects.

Tips: Keep the nozzle clean and centered. Preheat evenly before piercing. Move steadily, without forcing the torch. Match gas pressure to the cutting procedure. Watch the flame, not only the sound. A soft flame can produce incomplete cuts, while a harsh flame may enlarge the kerf. If slag sticks heavily, check travel speed and oxygen flow before changing several settings at once. Changing one factor helps identify the real cause.

In daily work, I have sometimes blamed gas pressure when a dirty nozzle caused the problem. That mistake is easy to repeat. Listen for popping, which can signal blocked passages, poor adjustment, or unstable flow. If the cut stops halfway, inspect the pierce point and confirm that the material is fully penetrated. Small holes, sharp corners, and visible cracks deserve closer attention. Record the material thickness, settings, and observed defect. This simple note can turn a frustrating repair into a reliable adjustment.

10 Welding Gas Cutting Tips for Better Results - Inspecting Cuts and Solving Common Gas Cutting Problems

# Inspection or Cutting Tip What to Look For Common Problem Likely Cause and Practical Fix
1 Check material and surface condition Confirm the workpiece is suitable for oxy-fuel cutting and that the cut line is free of heavy scale, rust, paint, oil, and moisture. The cut starts inconsistently or stops in contaminated areas. Oxy-fuel cutting relies on oxidation and is generally used for carbon and low-alloy steels. Clean the cut path and verify the material and thickness are appropriate for the equipment.
2 Inspect the nozzle before each job Look for a clean, undamaged orifice and an even, centered oxygen stream. Check that the nozzle is the correct type and size for the material thickness. Kerf is uneven, the cut wanders, or the underside has heavy slag. Damage, spatter, or blockage can distort the cutting-oxygen stream. Clean the nozzle with the specified cleaning tools or replace it; use the equipment maker’s nozzle and pressure guidance.
3 Set and verify gas pressures Check regulator readings with gas flowing as directed by the equipment instructions. Confirm hoses, connections, and regulators are in sound condition. The flame changes during cutting, or the oxygen jet lacks force. Incorrect working pressure, a restricted supply, or a leak may be responsible. Set pressures for the torch, nozzle, and material thickness; never compensate by exceeding rated limits.
4 Establish the correct preheat flame Use a steady, neutral preheat flame unless the equipment instructions specify otherwise. Bring the start point to an even red heat before opening the cutting oxygen. The cut hesitates at the start or produces excessive melting around the entry point. Insufficient or uneven preheating can delay ignition of the steel. Adjust the torch position and preheat time; avoid prolonged heating that unnecessarily widens the kerf.
5 Maintain a consistent torch position Keep the nozzle-to-work distance and torch angle steady, following the nozzle instructions and the intended cut geometry. Cut faces are beveled unexpectedly, or kerf width varies along the cut. Changing stand-off or torch angle alters heat input and oxygen-jet alignment. Use a guide or steady hand position, and recheck alignment before restarting.
6 Match travel speed to the cut Watch the cutting sparks and the underside of the plate. A consistent stream of sparks passing through the work is a useful sign that the cut is penetrating. Rounded top edges, heavy drag lines, or uncut sections at the bottom. Moving too fast can leave the cut incomplete; moving too slowly can widen the kerf and increase top-edge melting. Adjust travel speed gradually while keeping the nozzle and pressure settings appropriate.
7 Inspect the cut face and drag lines Look for a reasonably uniform cut face, consistent kerf, and drag lines that are regular rather than sharply swept backward. Deep, strongly angled drag lines or a rough, irregular face. These signs can indicate excessive travel speed, poor torch alignment, a worn nozzle, or unsuitable pressure. Change one variable at a time and make a short test cut.
8 Check for dross and slag After the work is safe to handle, inspect the lower edge for attached slag and check whether the kerf is open through the full thickness. Hard, firmly attached slag remains under the cut or the cut does not separate. Common causes include slow or fast travel, poor oxygen-stream quality, a dirty nozzle, or incorrect setup. Verify nozzle condition and settings, then adjust travel speed based on a test cut.
9 Check cut starts, corners, and stops Inspect entry and exit points, corners, and any restart for gouges, excess kerf, incomplete separation, or visible notches. Large entry craters, rounded corners, or a step where the cut was restarted. Use a controlled pierce or edge start suited to the job, reduce speed through corners, and overlap a restart slightly onto the completed cut while maintaining safe torch control.
10 Prioritize safe setup and post-cut review Before lighting, check for leaks, secure cylinders upright, clear combustible materials, provide ventilation, and use suitable eye and body protection. Afterward, review the cut before the next pass. Unsafe flame behavior, unexpected flashback, or repeated defects across multiple cuts. Stop work if equipment behaves abnormally. Follow the torch manufacturer’s lighting and shutdown procedure, inspect arrestors and connections as applicable, and have faulty equipment serviced by a qualified person.